
Nina Petchprapa
Technical Environment Artist
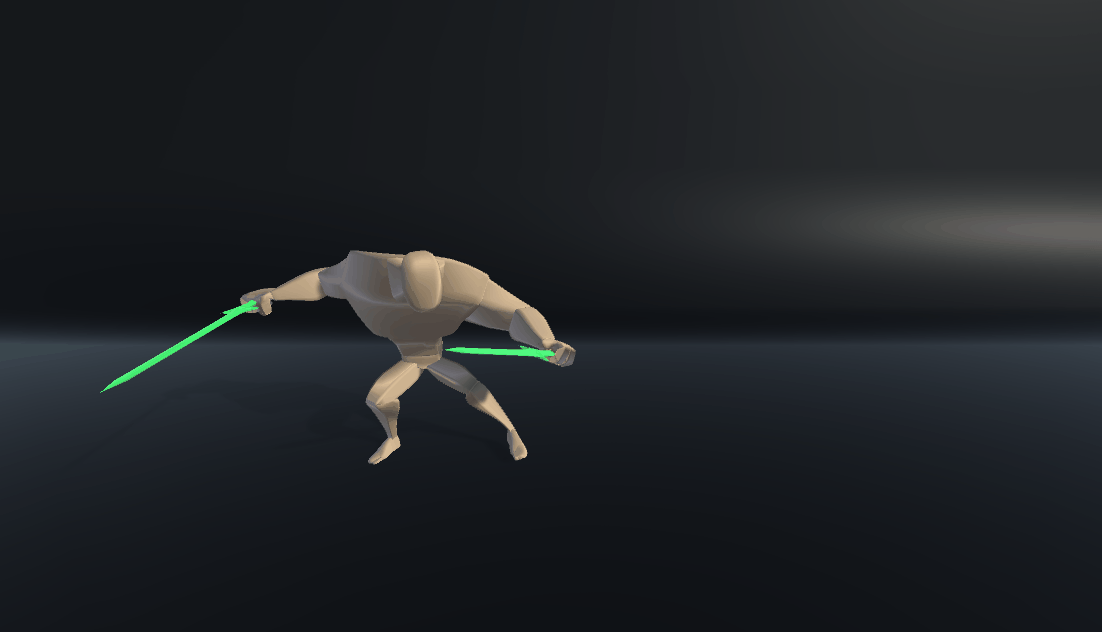
Sword Swipe
Program: Unity 2017.1.1, Visual Studio, Photoshop, Maya
Synopsis:
-
Swipe Effect
-
Method: Trail Renderer, Animation event, C#
-
Note: I tried out different methods, from purely using motion trail, to emitting a swipe polygon out from the particle system. Finally I settled on this method which seems to be the least complicated for a Unity VFX beginner like me.
Finished Product
1) Planning

1.1) Screenshot the animation keys from Maya.
1.2) Roughly plan out the effect sequence in an illustration program (Photoshop). Figure out the timing and how you want the effect to look.
2) Set up lighting
Since this is a simple scene which doesn’t take very long to work out the lighting and composition, I preferred setting up lighting earlier rather than later so that I could see exactly how the effect looked against the finalized scene.


Here is a simple 3-point lighting with a yellowish key light, a green fill light, and a blue backlight.
3) Set Up Trail Renderer
3.1) Create an empty game object. In Add Component, choose Trail Renderer. Try moving the game object around to see the motion trail.


3.2) Adjust Size, Time, Min Vertex Distance, and Width to preference. Check on Unity’s website for detailed information of each property.


4) Create Trail Material
4.1) In order to achieve a specific look I had in mind, I created a material with a .PNG texture. When importing the texture, make sure that the Alpha Source is “Input Texture Alpha, and Alpha is Transparent box is checked.
4.2) Assign this material to the Trail renderer at Element 0.


5)Set Up Trail Renderer
5.1) In order to have the trail comes out from the sword, position the created trail at the weapon and parent the trail object to the sword. Make sure that you parent it underneath a node or object that has change in translation. Adjust the Position and the Rotation as needed.
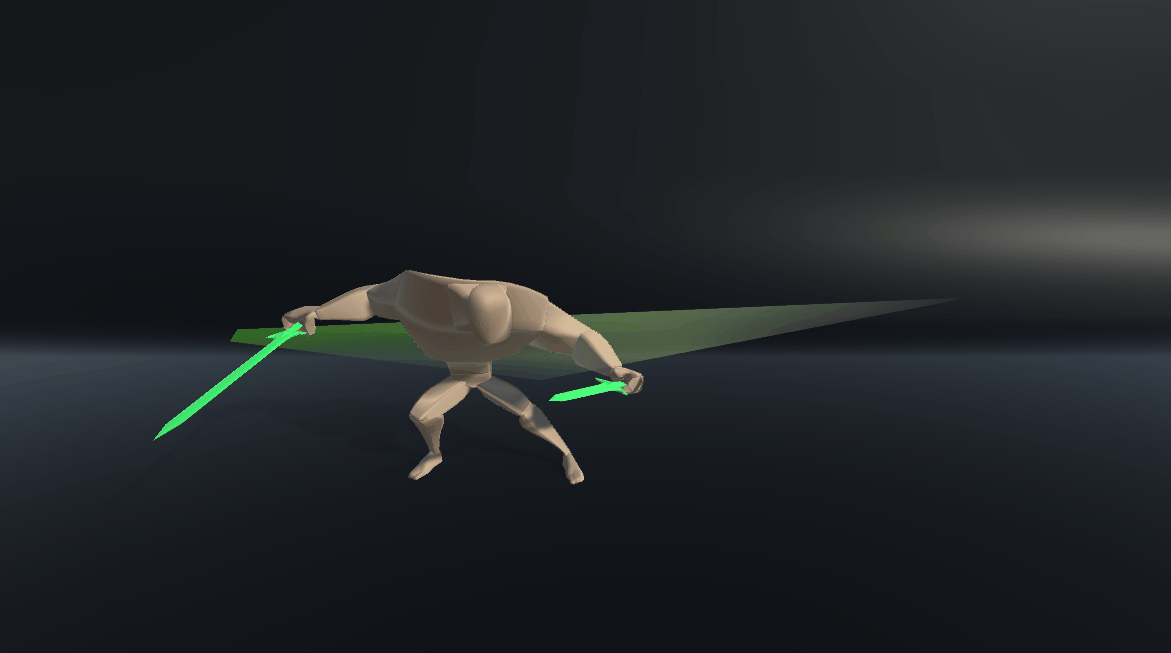
The problem that we can see here is that the trail would twist and comes out even when the sword is not moving quickly.
6-1) Drive with Animation Events
In order to have the trail start and stop at certain timing, I used Animation Events to drive the motion trail.

6.1) Create an event where the trail starts, and another when the trail ends.

6.2) Use SerializeField to make the variable appear in the editor.
6.3) Make a function that enables the visibility of the motion trail at Rtrail_Start1 event, and another function that disables the visibility at Rtrail_Stop1 event. Add Print function to check everything is working in the editor.
6.4) Don’t forget to add the created script to the animation mesh and assign the motion trail to property field.
6.5) Now the motion trail starts and stops at the designated times. However, it also starts at the very beginning when you hit play. To stop it from doing so, add rTrail01.enabled = false; after SerializeField
6.6) Create another Trail Renderer, parent it to another sword and repeat the process to have it driven by other Animation Events.


7) Secondary Motion Trail
7.1) For a personal preference, I added another layer of motion trail on top of the base one. Essentially they are just the base ones duplicated, and had its properties adjusted. (Position, Size, Time, and Color)
7.2) Added additional Animation Events that are slightly offset to the original ones. Name them properly.
And there you have it! :D


